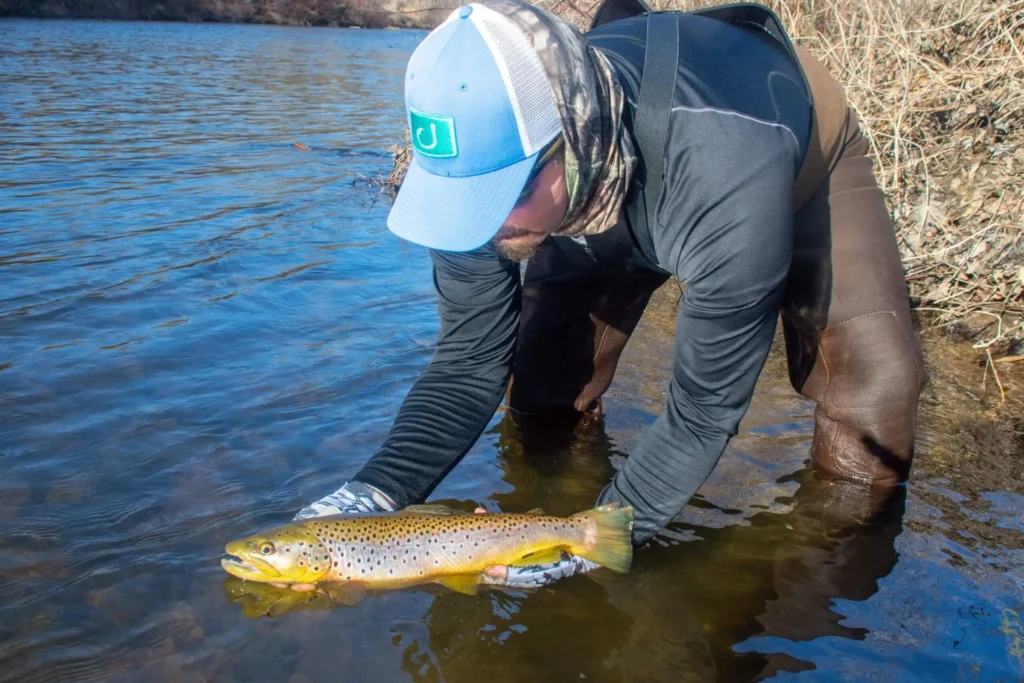
All About the Connection: How to Connect Fly Line to Leader and Leader to Tippet
An old adage states a chain is only as strong as the weakest link. The same is true for the connection between your fly line and leader as well as your leader and tippet. Not surprisingly, break-offs usually occur at these junctions, which are undoubtedly the weakest links in our fly fishing rigs.
Through this post we will explore various ways to connect the fly line to the leader as well as the leader to the tippet. Paying close attention to detail with these connections is important. Successful line to leader and leader to tippet attachments play a crucial role in fly fishing success.
Four Ways to Attach Fly Line to Leader
Loop to Loop
This is likely the most popular connection method today. In fact, most manufacturers offer fly lines and leaders with integrated or welded loops at the ends. Many years ago, when this was new technology, these loops weren’t always reliable. However, over the years, integrated loops have improved and can be trusted in all situations.
As its name implies, this connection involves utilizing a series of two loops, one on the end of the fly line and one on the butt of the leader. The leader is connected to the line by taking the loop of the leader and putting the fly line through it. Next take the tip of the leader and put it through the fly line loop. Pull the leader through the fly line loop until the leader loop catches the fly line loop. That’s all there is too it and you’re ready to fish.
As stated, many products on the market currently come with integrated loops. If your fly line does not have a loop, there are aftermarket loops that can be added to your line. For leaders, a loop can be quickly and easily tied into the butt section of the leader.
Nail Knot
Prior to the popularity of the loop to loop connection, the nail knot was king. A nail knot is an effective method for taking two lines, in this case the fly line and leader butt, and tying them together with a strong uniform knot. When tying this knot, a Tie-Fast Knot Tyer is a handy tool to have with you.
To tie the nail knot take the following steps:
- Take the fly line end and leader butt end and hold them together with the tips pointed opposite directions
- Place a small piece of tubing below these two lines
- Take the tip of the leader butt and make 5 snug wraps around the fly line and tube moving in the direction back towards the tip of the fly line
- Insert the end of the leader butt back through the center of the tubing pulling it back through in the opposite direction.
- Remove the tube and begin to tighten the knot by pulling on the leader (pull on both the tip of the leader butt and the main leader section in opposite directions).
- Pull the knot tight and cut the tag end of the leader butt to complete this connection
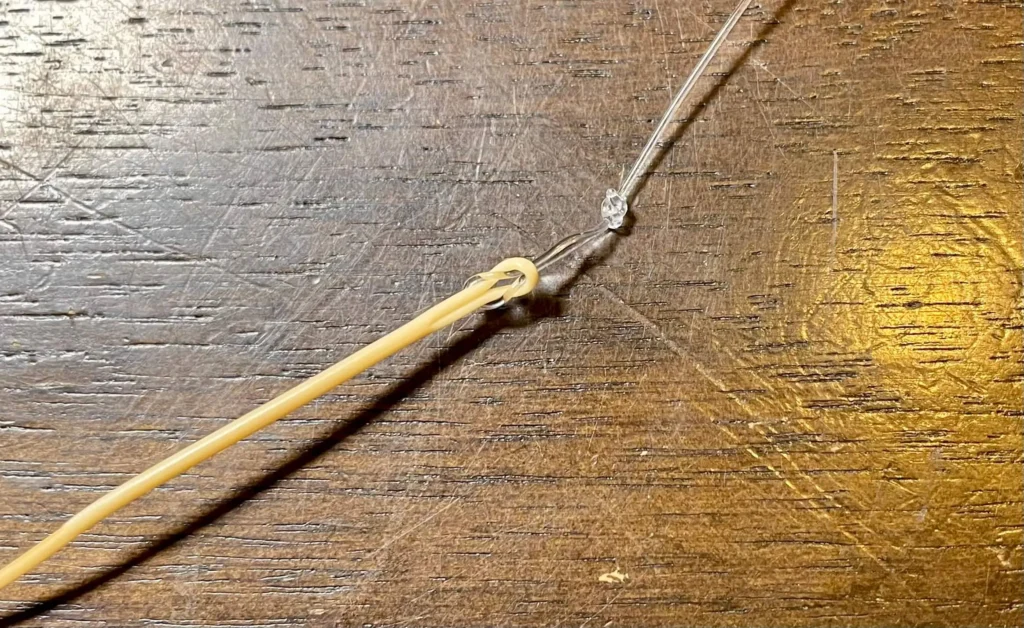
Super Glue Connection
This popular alternative connection uses super glue to glue the butt of the leader into the braided fly line core.
This is accomplished by placing the tip of the fly line in nail polish remover for several seconds. The nail polish remover weakens the outer exterior fly line coating, allowing it to be removed. This will expose a small section of the fly line’s core which is braided material. If you don’t have nail polish remover available, another popular way to remove the fly lines outer coating is to use monofilament. Tie a knot around the fly line that breaks through the outer coating and then pull the monofilament down past the end. This will also successfully expose a small section of the fly lines braided core.
The braided material can be slightly separated in its center. This is made easier through use of a sewing needle. Once separated in the center, the butt of the leader can be inserted into the fly line’s core. Apply some super glue to the outside of the braided core (the glue will seep through and attach to the leader butt as well). Once the super glue dries, you are left with a streamlined, strong leader to fly line connection.
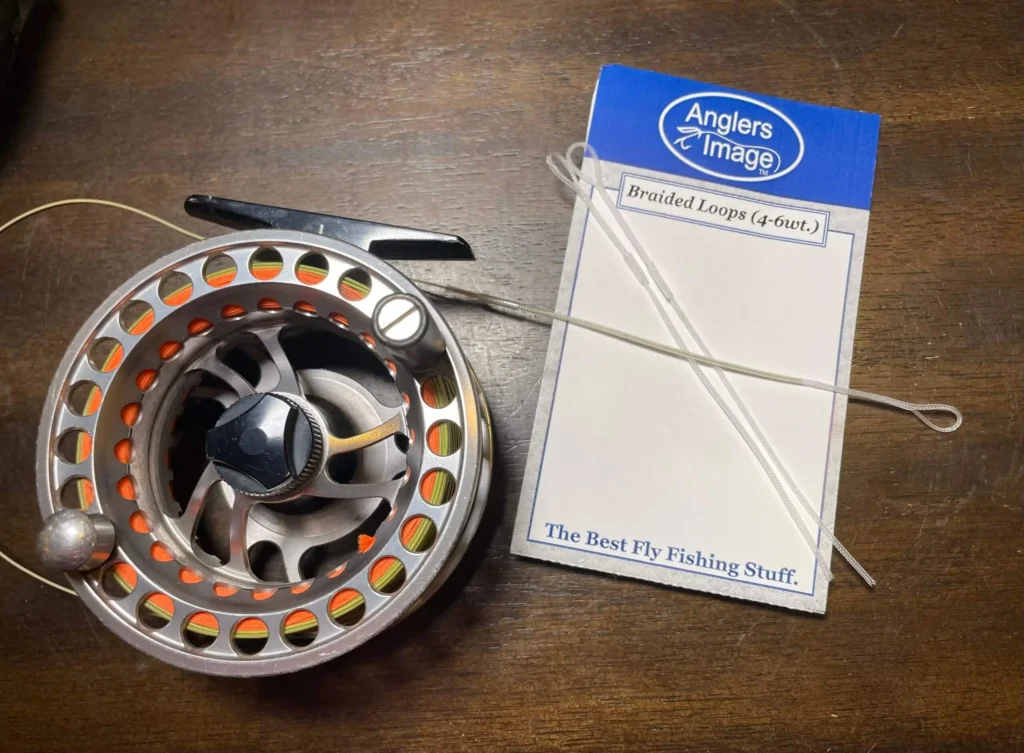
Braided Loop Connection
A fourth option is using a braided loop connection. Many companies, such as Angler’s Image, manufacture quality braided loop connectors that are effective and relatively easy to install. These work especially well on fly lines that came with a welded loop that has started to show signs of wear. Simply cut off the welded loop and follow the instructions on the package.
First, insert the fly line into the hollow base of the loop connector and push it as far into the braided connector as it will go. Next, slide the clear tubing down over the tubing and line until it’s about a half inch or so from the end of the tubing. Last, add a touch of super glue to the connector. This last step isn’t absolutely necessary, but it does provide a little peace of mind that everything will be locked in and secure.
Installing a braided loop connector means having spares on hand as a backup, but it does produce a strong, reusable loop that can then be used in a loop-to-loop connection with the leader.
Which Connection is Best for Fly Line to Leader?
So, with all these options, which is the best to use? This largely depends on the circumstances. Each of them possess advantages and drawbacks.
You can’t go wrong with the loop-to-loop connection in regards to simplicity and ease of use. It is very fast and efficient to change leaders with this system. However, a potential drawback is the necessity of having a reliable loop at the end of both the fly line and leader. If your current equipment doesn’t have an integrated or welded loop, or something happens on a fishing outing that ruins a loop, it is nice to know the nail knot as a backup.
The nail knot is an effective means for attaching the leader, but it does take a little time and practice to learn. Nonetheless, it is a very time-tested, effective method. All fly rod anglers should be familiar with the use of a nail knot.
Neither the loop-to-loop nor the nail knot is as streamlined as the super glue method. If you rely on the ability of the connection to travel through guides on the rod, this is a perfect choice. However, this may not be a great option if you are working to connect the leader back to the fly line in the middle of a fishing trip. Also, I’m always hesitant to fully trust the strength of the super glue connection over the nail knot or the loop connection, which I believe are stronger options.
The braided loop connection is a viable option for basically creating a new loop on the end of your fly line that can then be used for loop-to-loop connections. The drawback is that you may not have these on hand when traveling. However, they are very strong and reliable once installed and have excellent durability.
Three Ways to Attach the Leader to the Tippet
Tippet selection, both size and material type, is an important factor in the angling equation. Without the right tippet, one can choose the correct fly, cast it to the right location, allow for a drag free drift, and still have a wary trout snub his nose at the presentation. Moreover, no two situations are the same. Tippet selection must be changed to match the fly size, fly type, water conditions, and other factors. As with the fly line to leader connection, the strength of your leader to tippet connection can determine how successful you are on the water.
There are several options to connect tippet sections to your leader. Here we will discuss the surgeon’s knot, the blood knot, and tippet rings.
The Surgeon’s Knot
A quick and easy connection option is the surgeon’s knot. To tie this knot, align the tip of the leader with the tip of the tippet section being applied. Fold both tips back around the main sections together to form a circle. Then weave both tips through the circle three times and pull tight. Cut off the excess tags and you will be left with solid knot connecting your tippet sections.
This is a great option, especially for changing/adding tippet while fishing. Note that you can leave one of the tag ends long, if you would like to attach a dropper fly at that location.
The Blood Knot
Another knot to connect tippet sections is the blood knot. While this knot is a little more complex, it is by no means difficult to tie. I typically utilize a tool called a Dennison Blood Knot Tool to tie my blood knots. However, it can be tied without a tool as well.
To tie the blood knot without a tool, follow the steps listed below:
- Start with two sections of tippet, take the ends and put them together so they intersect with the tips pointing opposite directions.
- Take the tip of the line that is pointing left and make four wraps going over the opposite tippet segment to the left.After the wraps are formed take the tip back to the intersection of the two sections and hold it so it is pointed up.
- Take the other tip of the section pointing to the right and make four wraps over the opposite tippet segment moving to the right.After the wraps are formed, take the tip back to the intersect point and put it through the hole that has been formed there (pointed down).
- Pull on both long segment of tippet to make the knot tight (make sure that the tag ends do not pull back through the knot).
- Trim the tag ends and you will be left with a strong, uniform knot.
Note that you can leave one of the tag ends long, if you would like to attach a dropper fly at that location.
The blood knot has several advantages. It is a very strong knot and it has a uniform shape. Due to its shape, it can slide through rod guides relatively easily if needed.
One of the only drawbacks to utilizing the blood knot is it can be the most complex of the three connection methods listed here.
However, there are tools available that can make tying the blood knot easier. The Dennison Style Blood Knot Tool is a popular option. To tie a blood knot with this tool, secure the ends of the separate tippet sections with the clamps (tips should be pointing opposite directions). Take out the white colored pick and split the tippet sections with it. Twist the pick about 6-8 times and stick the pointed end in the holding hole (make sure that the pick still is holding the tippet sections).
Next, release the tips from the clamps and weave them back through the hole created by the two tippet sections in the middle (one should be pointed upward and the other pointed down). Finally, pull on each side of the tippet line (make sure the tag ends do not pull back through the line) to make the knot tight and finish the process. Cut off the tag ends and you are ready to fish.
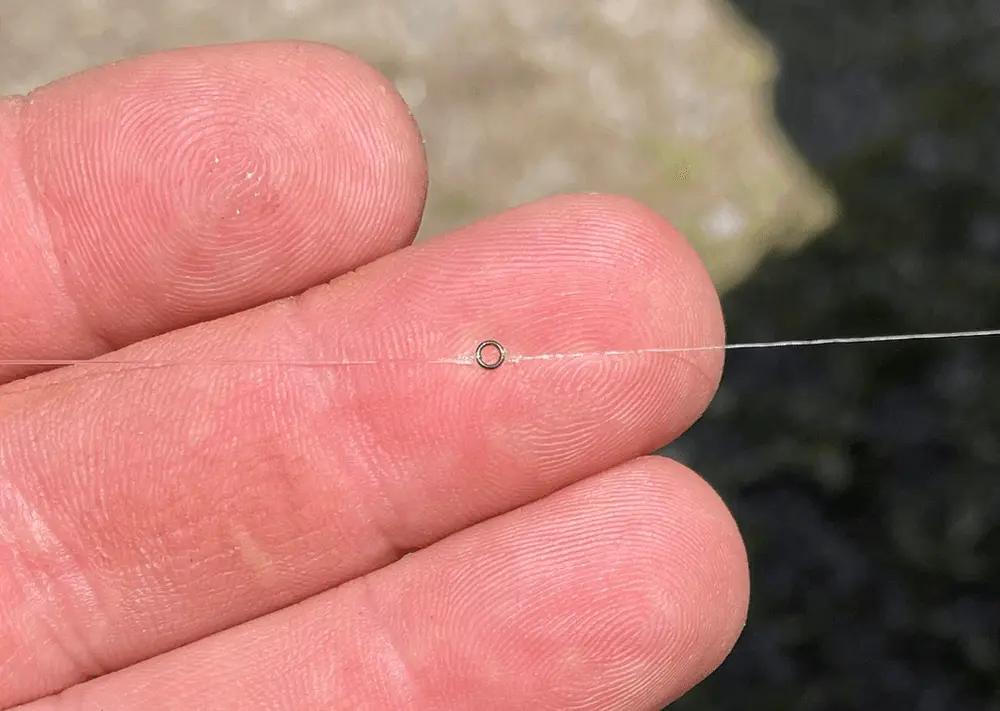
Tippet Rings
Another popular option for attaching tippet sections are tippet rings. There are very small metal rings that each side of the tippet can be tied on to. To attach the tippet section just tie each tip to the tippet to the ring with your favorite knot to attach a fly. Improved clinch knot or Palomar knot are the most popular.
Tippet rings are very easy to use and make it simple to attach dropper flies. Additional tippet sections can be connected to the initial ring to add dropper flies to your rig. Another benefit is leader length will not be shortened each time a new tippet is added. With both the surgeon’s knot and blood knot, a small section of leader will be lost to the knot as the tag end is trimmed off. As you replace tippet, your leader will get shorter each time a knot is tied. The tippet ring is a great option to prevent this from happening and extend the life of your leader.
Tippet rings are also available in multiple sizes, from 1mm for light tippets and smaller fish up to 4mm heavy tippets and larger fish.
Click here to read more about how to use tippet rings for both nymphing and dry fly rigs.
Knots are an essential part of fly fishing, and knowing the handful of knots mentioned here will allow you to quickly connect your fly line to the leader and the leader to the tippet. Throughout a fishing season, they all can be successfully utilized depending on the situation and resources available.
However, care must be taken to tie clean and effective knots. Practice tying them as often as possible until you master each one. After all, these knots could potentially be the weakest link in your fly fishing rig. When tied and used correctly, though, these connections will work with the rest of your angling system to successfully hook and land fish.
____________________
About the author: Matt Marter is an avid fly fisherman who frequently pursues bass and trout throughout Central Pennsylvania. He is a member of the Pennsylvania Outdoor Writers Association and lives with his wife and son in the town of Huntingdon. Check out his website by clicking here.
Did You Enjoy This Article?
Stay up to date with the Dark Skies Fly Fishing monthly newsletter for free and receive the latest posts in fly fishing news, tricks, tips, and techniques, stream reports, as well as updates on new flies added to the Online Store and exclusive discounts!
Sign Up NowHave a fly fishing question you’d like answered? Drop us a line at info@darkskskiesflyfishing.com! If we use your question in a blog post or in the newsletter, we’ll send you a FREE fly box with a dozen of our favorite nymphs and dry flies!