How to Repair Leaky and Torn Waders
Earlier this spring, upon taking off my boots and stripping free of my waders, I discovered my wool sock was quite damp. I didn’t think too much of it because I do sweat a lot and the mid-May days were quite warm. As I spent additional days on the water, my right foot continued to dampen inside of my year-old waders. By mid-June, on a week-long fishing trip in Maine, my right foot was no longer damp but sloshing around in the neoprene bootie and my wool sock needed to be wrung out at the conclusion of each session on the water. Ugh, a terrible case of the wader swamp-foot as a result of a leak!
If you fish 50-plus days each year, then there is a good chance that you will develop leaky waders, and it doesn’t matter what brand they are or how much you paid for them. They are going to leak. Afterall, waders are simply waterproof britches, and when fishing hard, these water tight pants are subjected to all kinds of harsh and nasty treatments. If you’re like me, you don’t think twice about plopping down on a jagged piece of limestone to untangle your tippet.
You don’t hesitate to scooch down a vertical bank on your derriere to nymph a beautiful riffle. Nor do you pay much attention to a multiflora rose thicket as you sneak up on a tiny brook trout stream. But all of these things eventually take their toll on waders.
Contemporary, breathable waders are built better than ever and are far more performance-oriented than their restrictive, stifling, and cumbersome neoprene and rubber counterparts of the past. Nonetheless, when subjected to continued abuse week after week, session after fishing session, they are going to develop leaks. This is discouraging for fly fishers because modern breathable waders remain among the most expensive pieces of gear we use. But there’s good news! Don’t cast aside those leaky waders and run out to the local fly shop or internet supplier to purchase a new pair. You can fix the godforsaken things! It’s not overly challenging, but it does require a bit of effort and gumption.
As with any task, repairing fishing waders requires appropriate tools and materials to complete the job. Some of these are readily found around most households. Others can be easily purchased at any hardware or home goods store.
Materials Needed to Fix Leaky Waders
Foremost, when you first recognize that your waders are leaking, take a mental note of where on your lower half you are getting wet. Is it just your right foot below the ankle that is wet? Is your left knee wet as well as your left shin? Recognizing where you are wet will allow you to focus on where you test the waders for leaks, which makes finding pinholes and tears a bit easier.
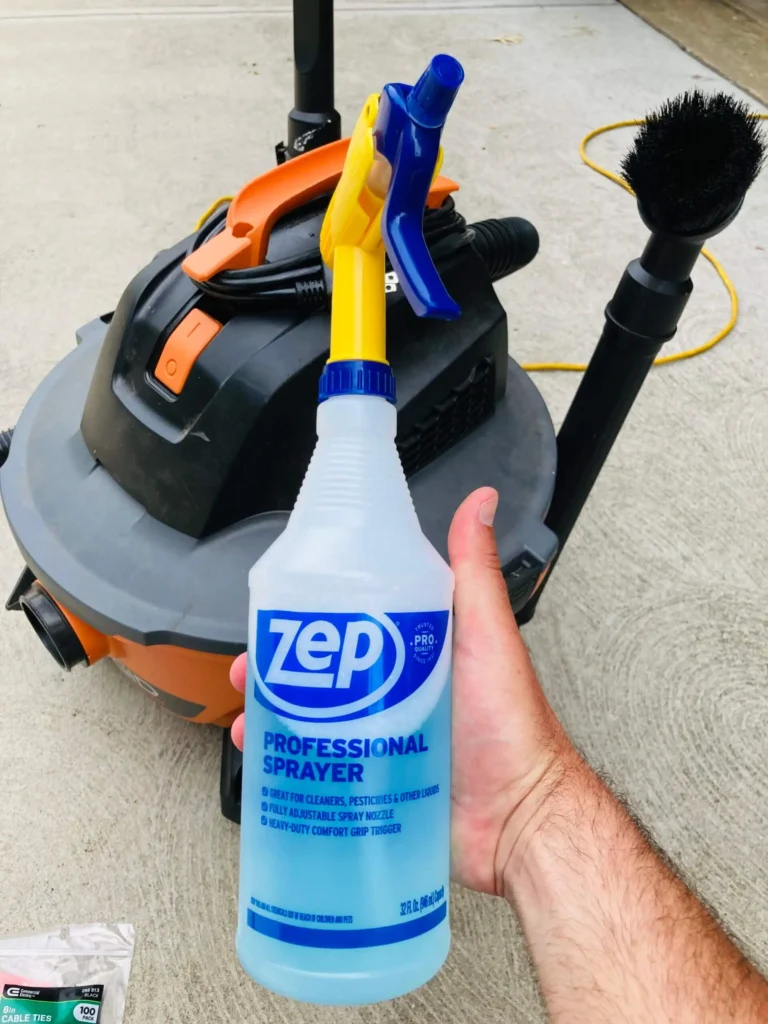
Here’s a list of items that will come in handy for locating the source of the leak:
- Two-way shop vac
- Permanent marker that can write on damp, rough and oily surfaces
- Dish detergent
- Spray bottle
- Plastic wash tubs
- Electrician zip ties
- Art and craft paint brush
- Sharp pocket knife or scissors
- Aquaseal + FD adhesive or Loon UV Wader Repair
- Wader patches or Gorilla tape for backing
How to Locate Larger Holes and Leaks in Waders
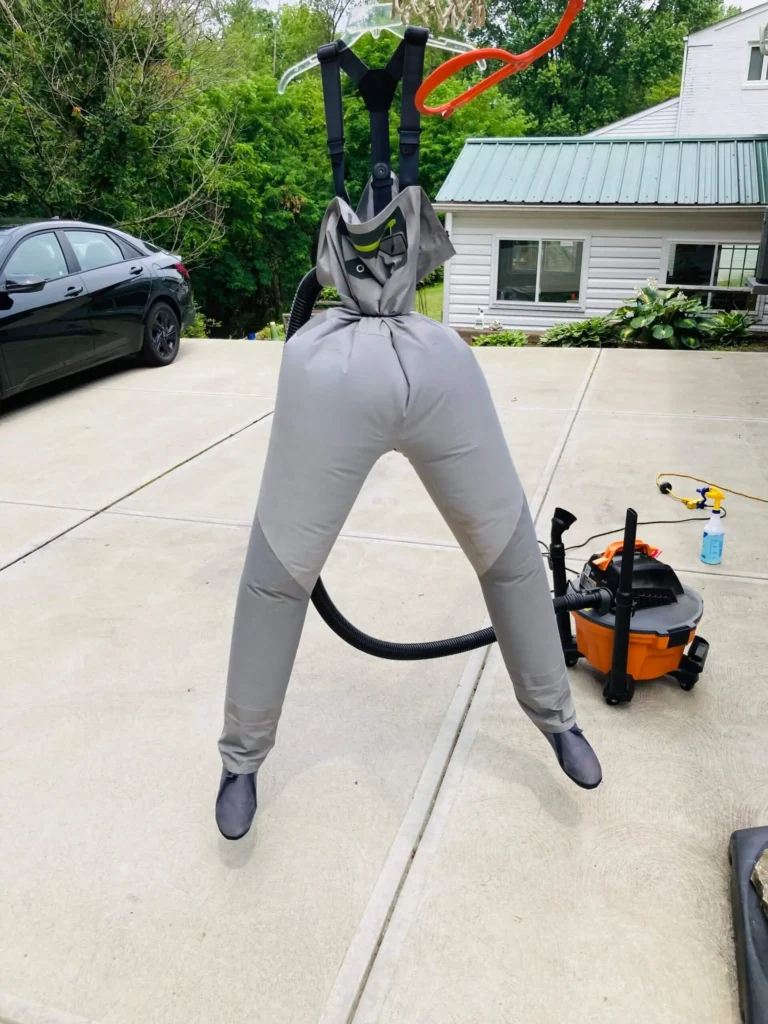
Begin by hanging your waders in an elevated position on the driveway or in the backyard. Reverse the shop vac so that it blows air and run the hose into the top of the waders. Using zip ties, secure the hose inside of the waders by cinching it around the chest. Be careful not to cinch the shop vac hose too tightly. It is advisable that air can escape so that seams are not blown out or compromised. This maneuver will take a bit of trial and error and practice to get correct.
Next, I find it most effective to completely hose down the waders saturating the outside surfaces. Mix up a solution of detergent/water using a liberal amount of detergent. Having the waders already saturated will allow the solution to suds up better once applied.
Inflate both legs of the waders with the shop vac. Spray down the waders with the detergent/water solution beginning at the chest and working down one leg then the next to the foot booties. Do not be conservative spraying soapy water. For the smooth parts of the breathable material use your hand to create a lather. Liberally spray down all seams in the waders with the detergent. I cannot stress enough to not go easy on the soap!
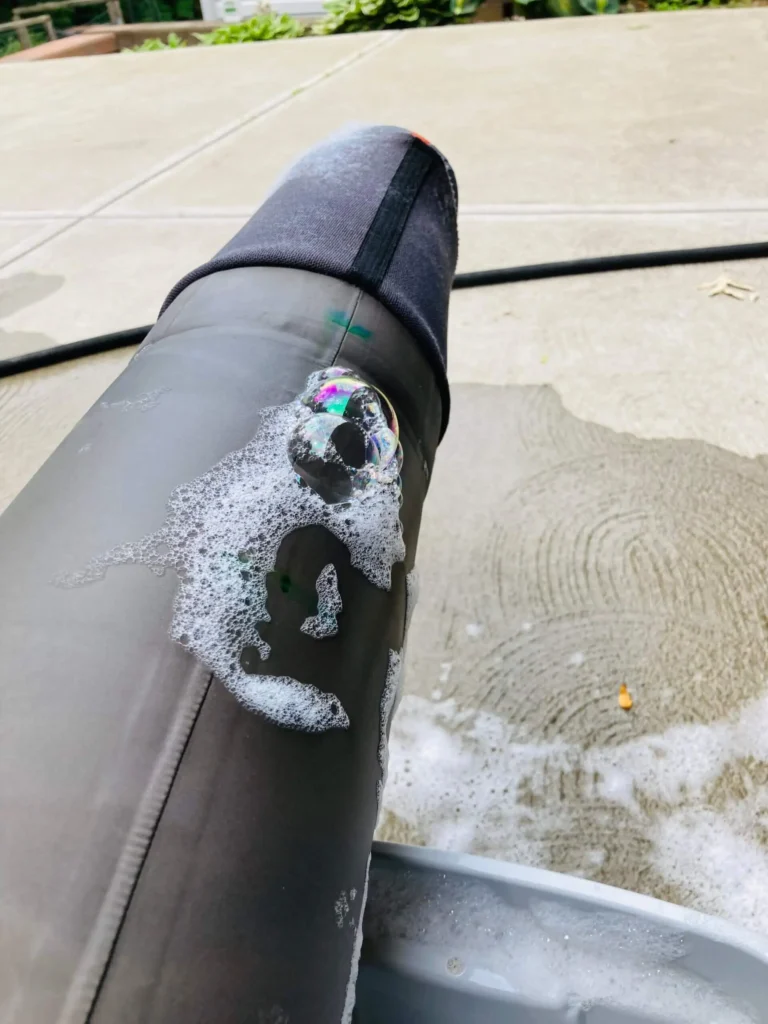
As the waders are being sprayed with soap, carefully watch for any bubbles or suds to form. If suds form in a suspicious spot, continue spraying with soap and use your hand to create a lather to confirm the location of the leak as more and more bubbles will develop. Once the location of the breach has been discovered, turn off the shop vac, rinse off the suds and use the permanent marker to circle the location of the leak. Once the leaks have been found, rinse the detergent from the waders and hang to dry completely before patching the holes.
How to Locate Pinholes and Stockingfoot Leaks
Some of the leaks that appear in fishing waders are teeny-tiny pinholes that can be damn near impossible to detect yet do a wonderful job creating a wet rearend or waterlogged foot. Other times, waders develop leaks in the neoprene booties. These don’t even appear as holes but are created in places where friction frays and thins the material causing water to penetrate. These types of wader leaks are most often undetectable using method one.
For method number two, you’ll need two 18-quart plastic dishwashing tubs. Begin by filling one tub with soapy water using dish detergent. Fill the second with clean, clear water.
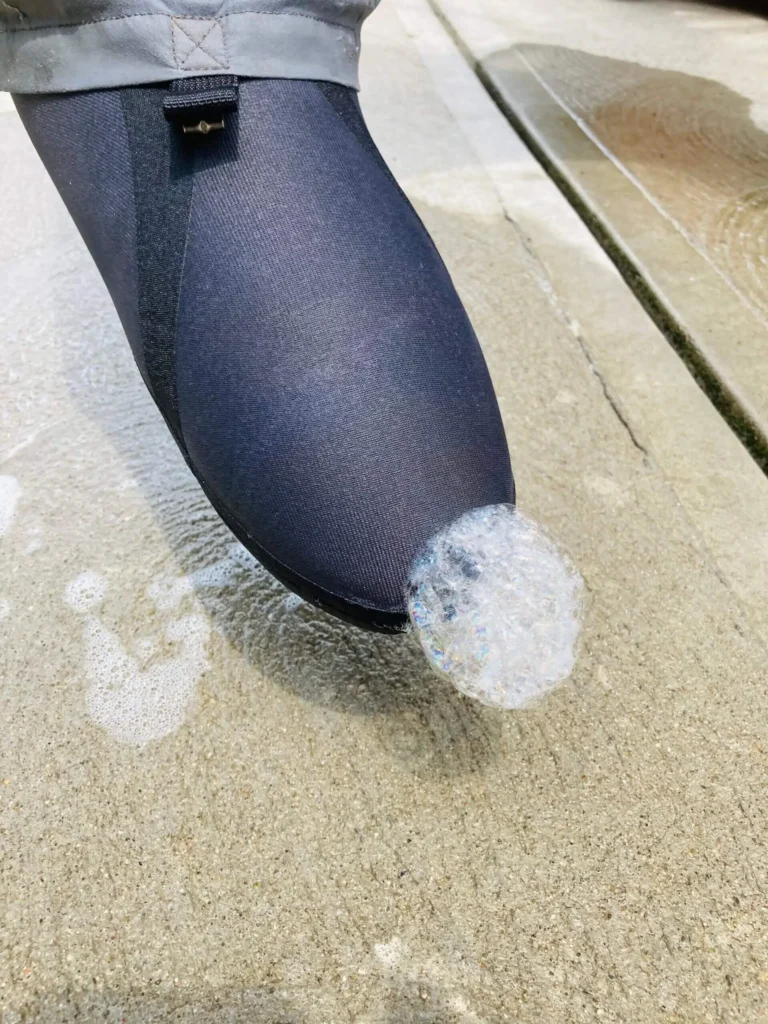
Beginning with one wader pant leg, dunk and submerge completely in the soapy water making sure to saturate the material in suds. Insert the shop vac hose at the top of this leg near the crotch and use your hand to create a seal. Inflate the leg with the shop bac. Again, the seal does not need to be airtight or there is a risk of damaging the seams with too much air pressure.
With the wader leg inflated, inspect all sides looking for bubbles forming at the spot of a leak. Once the leak is discovered, use the permanent marker to circle or box the breach.
Once all of the leaks are found, rinse the soap and suds from the wader leg in the clean water and repeat on the other side. Finish the job by using a garden hose to rinse off any remaining soapy water from the surfaces of the waders.
Patching Pinholes and Seams
Locating the leaks in fishing waders is the most challenging part of the operation. Using Loon UV Wader Repair or Aquaseal to repair the leaks is far more straightforward. After letting the damaged waders completely dry for 48 hours, it is time to patch the pinholes and damaged seams.
Be sure to complete this step outside or in a well-ventilated room such as a garage or open tool shed. The fumes from Aquaseal are quite strong. Also, it is a good idea to fully read the included instructions and safety suggestions before using this product.
When patching small pinholes, either in the breathable material on the legs of the waders or in the neoprene booties, simply apply a liberal dab of the Aquaseal adhesive to the damaged area previously circled with the marker. Using a small arts and crafts paint brush, work the product around the perimeter of the hole. I like to create a one-inch diameter circle with the product around the leak. For small pinholes it is unnecessary to use a patch or backing material. The Aquaseal alone will readily seal these tiny leaks.
When repairing a seam leak, run a bead of Aquaseal along the damaged area. Again, using the small paintbrush, work the adhesive into the folds of the seam and extend about one half inch on either side. This will assure that the product completely repairs the damaged seam. Be sure to lay the waders out flat with the repair facing up to dry for 24-48 hours. Once the adhesive has dried and cured, it’s time to go fishing!
Patching Large Tears in Waders
Larger tears in fishing waders are actually more favorable than pinholes and seam leaks because they can readily be seen. Also, repairing them is no more challenging but it does require an additional step. Large tears require the use of a patch or backing material to successfully repair.
The best patch for repairing waders is to use a small piece of wader material. An Aquaseal repair kit comes equipped with a couple of these patches. Patches can also be cut from old waders that are too damaged to effectively repair. In a pinch, a piece of Gorilla tape can be used as a backing material, too, instead of a proper patch.
Begin by cutting a patch, using scissors, razor knife, or a sharp pocket knife, that will fully cover the tear with a liberal amount of overlap. Place a bead of Aquaseal over and around the tear, use the paint brush to smooth evenly and affix the patch directly over top.
It is a very good idea to use a second bead of Aquaseal around the perimeter of the patch. Again, use the paint brush to smooth the product out evenly. Lay the waders out flat and allow the repair to fully cure before fishing.
Conclusion
Although these procedures require some effort and time, repairing damaged waders is far more cost effective than discarding them and replacing them with a new pair. As a matter of fact, repaired waders using Aquaseal and a patch are often more durable than the original product!
Of course, there is a point when waders are too far damaged or compromised to be effectively repaired. At this point, it is time to bite the bullet and purchase a new pair.
No waders on the market will ever last an angler a lifetime of hard fishing. Nevertheless, extending the life of a pair of waders for one, two, or even three years is a huge win for your wallet! So before placing those leaky waders out for garbage pickup, give repairing them a try. You will find that it is not only possible to achieve, but cost effective, too.
Did You Find This Article Helpful?
Stay up to date with the Dark Skies Fly Fishing monthly newsletter for free and receive the latest posts in fly fishing news, tricks, tips, and techniques, stream reports, as well as updates on new flies added to the Online Store and exclusive discounts!
Sign Up NowDownload our eBook "Confidence Flies: Volume One, Euro Nymphs" for free today when you sign up for our newsletter!

Have a fly fishing question you’d like answered? Drop us a line at info@darkskskiesflyfishing.com! If we use your question in a blog post or in the newsletter, we’ll send you a FREE fly box with a dozen of our favorite nymphs and dry flies!
i used ..FLEX SEAL the aerosol spray, that stopped my leaking waders
That’s a really good idea! Have they held up good?