Back to Basics: Indicator Nymphing
The fishing was slow and trout were skittish. I’d caught two rainbows but missed a handful of others, mainly because the bite was so subtle that they shook off before I even realized they were on the hook. I took a break to ponder the situation and noticed a plastic package half-covered with fallen leaves on the streambank. Although the package was almost empty, there were still a couple of pink plastic foam pads inside. I pinched one onto my line about two feet above the nymph I’d been using and my day took a dramatic turn for the better. All of a sudden, all those misses started turning into catches.
That was over 20 years ago, but that day was a landmark moment in my fly fishing career. I’d read about strike indicators prior to then, and like other critics, I’d brushed them off as “glorified bobbers.” I envisioned myself a fly fishing purist, after all, and the idea of putting a bobber on my fly line seemed blasphemous. Now, after realizing how effective they are for fishing nymphs, I gladly tie one on.
The original strike indicators were attractor-style dry flies fished with droppers, and they’re still a good option today. Big, gaudy flies such as Stimulators, Humpies, and Royal Wulff’s generally work best because they’re durable enough to support the additional weight of the nymph. They’re also the most visible. The added bonus is that you have another fly on the water that might spark a trout’s appetite, which gives you two chances to catch fish.
There are times, though, when casting a dry fly-nymph combination might not be ideal, such as when I’m fishing fast, deep water or fishing big nymphs for big trout. In both instances, I prefer a nymph tied straight to the leader or tippet because both can put a strain on your tackle, and fewer knots means fewer things that can go wrong. Also, I occasionally prefer to just fish nymphs and don’t want the extra hassle of tying on a dry fly and then attaching a dropper. In those situations, I use one of the many varieties of strike indicators on the market.
Sometimes a manufactured strike indicator can spook fish on waters where trout see a lot of them. I equate it to highly-pressured whitetails that have a tendency to look up in an attempt to spot the silhouettes of hunters in treestands. Finicky trout can display the same traits, so you’ll need an indicator that accomplishes its purpose yet goes unnoticed.
Strike indicators come in a wide variety of styles and colors. I opt for the smallest indicator I can get away with that will still support the nymph. If the weight or drag of the nymph is pulling the indicator underwater, bump up one indicator size.
Color can play a major role in how trout react, too. Although orange and pink are the most visible, white or off-white are usually better options. In nature, white objects often end up on the water – bird feathers, dandelion fibers, plant matter, etc. A white indicator appears no different than objects they see on a daily basis anyway.
A good gauge as to whether your indicator is working or detracting from your success is observing how fish react as it passes overhead. If they dart around the pool or even slash at the indicator, you know your indicator is drawing too much attention and you should switch to something more subtle.
The first strike indicators I ever used were plastic foam pads that had adhesive on one side and pinched onto your leader above the fly. They’re still a simple, easy-to-use product, but they have disadvantages. Once in position, they can’t be moved, and if you do decide to take them off, they usually leave a bit of sticky residue on the leader. That might not sound like a big deal, but throughout the course of a day, I fish a variety of water depths and current speeds, which requires a lot of adjustments. On an all-day excursion, I can burn through a lot of that style of indicator.
Which Indicator to Use?
Nowadays, I prefer reusable strike indicators. Depending on the brand, a package of three usually costs about the same as a handful of quality dry flies, and some of them will last multiple seasons – or until they end up in a fly-grabbing tree. Airlocks, Thingamabobbers, Tipper Strike Indicators, and Whitlock’s Telstrike Indicators are all good options that I carry with me.
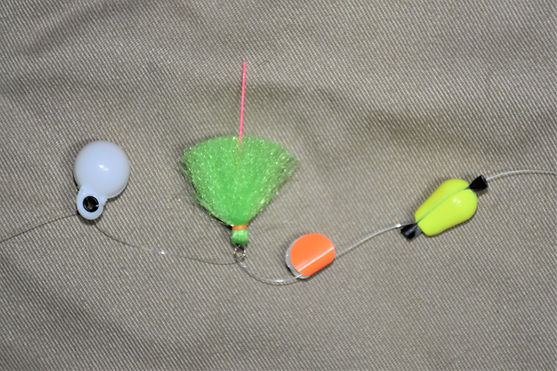
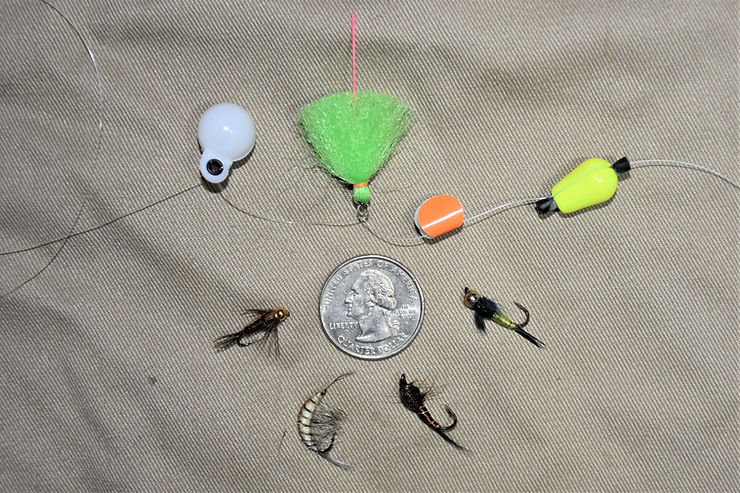
Strike indicators are great tools for fly anglers. Pictured left to right: Thingamabobber, Whitlock’s TelStrike, pinch-on style indicator, and Tipper Strike Indicator.
Synthetic poly yarn tied to the leader works as an inexpensive indicator, too. The advantage of the synthetic poly yarn is that it can be colored and trimmed to fit the conditions. They’re also extremely sensitive and allow for a soft presentation. Bigger, bulkier indicators that land on the water with a plop can spook wary fish.
I treat my yarn-style strike indicators with fly floatant. This helps them ride higher as well as makes them easier to lift up off of the water when setting the hook or preparing to make another cast.
Placement of the indicator on the leader can be a conundrum. You want enough distance between the indicator and nymph so that the nymph bounces along the bottom, yet the closer the indicator is to the nymph the better you’ll be able to detect strikes. Usually I settle on whatever the average depth of the pool or run happens to be. If my fly never bumps the bottom, or I don’t snag the bottom at least once in a while, I set it deeper.
Detecting strikes can be challenging even when using an indicator. Trout are constantly in motion, sucking in and spitting out debris in a fraction of a second as they test its texture to determine whether or not it’s food. In the same manner, they can inhale and exhale a fly before the sensation even travels up the line to the indicator. Even once they take the fly, there’s always a slight delay before the action is transmitted up the line, so your reaction time is important. A quick hookset will land you more fish.
Strike indicators require complete concentration. If I see the slightest bit of hesitation or erratic movement with the indicator, I set the hook. Even if it’s a false alarm, and my indicator paused because my fly scraped the bottom, I’d rather set the hook and have nothing than not set the hook and miss a fish.
Indicators take a lot of the guesswork out of strike detection. They’re one product that can almost immediately make you a better nympher. They’re more than just a bobber, and they can turn a frustrating outing of missing fish into a day of catching that you’ll never forget.
_________________
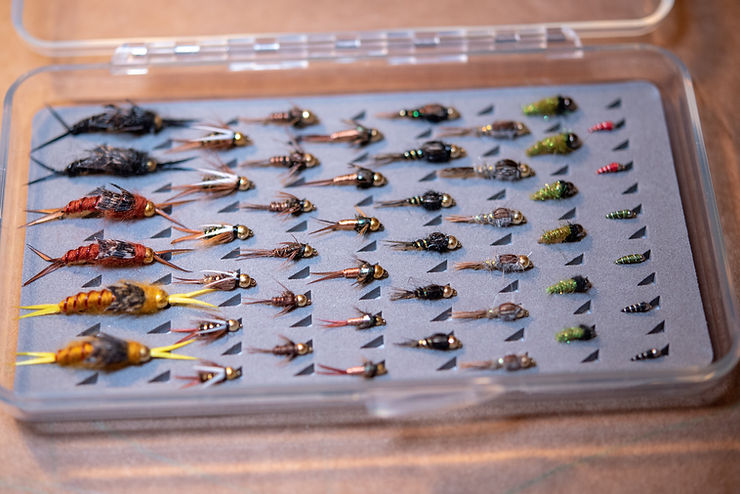
Shop flies, assortments, and stream guides in our Online Store. Pictured below is our Essential Nymphs assortment, which includes 48 tried-and-true nymphs in a variety of sizes that belong in every fly fisher’s box.
Hey Ralph. I don’t quite understand when to euro nymph versus when nymph with an indicator. Or, can I nymph with an indicator using my euro rig and/or flies? You do a great job explaining convoluted ideas. Like your latest article that categorized euro nymphs. So many light bulbs went off in my head as I read that!
Thanks man,
Bill
Hey Bill,
Thanks for reading and dropping a line! The way I look at it is that there are certain situations where indicator nymphing excels and situations where Euronymphing is best. In my opinion, indicator nymphing is a universal technique that can be used by anyone, anywhere, using almost any type of rig, even a Euronymphing rig. I often Euronymph particular sections where there are good riffles and runs, which are ideal for that technique, but when I get to larger, slower moving pools, I’ll pinch on an indicator above my flies. I still use Euro nymphs with the indicator, as I mentioned in the article you referenced that’s also on this site.
Euronymphing relies on maintaining constant contact with the stream bottom. That’s much easier to achieve in riffles and runs that are 2-3 feet deep, but more importantly, where there’s enough current to keep your flies moving at a steady pace. (Justin wrote a great article last summer that you may want to check out on this site: “Nymphing Approaches for a Specific Water Type.”) Generally speaking, Eurnonymphing is at its best when done in the specific water types he mentions in that article.
Larger, slow moving pools are more difficult to Euronymph because the flies simply sink to the bottom and you can’t get a natural drift because the current is just too slow. Also, because these pools are deeper, there’s more distance between your rod tip and the nymphs, which makes it a lot harder to detect strikes. In these situations, an indicator rig is superior because the indicator allows your flies to still dead-drift naturally near the bottom and helps you detect the strike a lot easier.
The advantage of indicators is that they’re not as complicated to fish. The real trick to using them is to get a drag-free drift so that the nymphs drift as naturally as possible and as close to the bottom as possible. So in Euronymphing, you’re fishing the nymphs (contact nymphing) but with indicator nymphing, you’re basically fishing the indicator, which allows you to fish the nymphs by default.
Hope this helps!
Ralph
very nice article. i’ve started using the smallest thingamabobber on my euronymphing rig when I’m not catching fish when I think I should be. the euro rig lets me be tight to the indy so that i’m getting as drag free a drift as I can. I attach the indy above my tippet ring (essentially onto my sighter material).